Welcome to the world of Glamade, where beauty meets convenience! Press-on nails have become the hottest trend in the world of manicures, and Glamade is here to revolutionize your nail game. Whether you're a nail enthusiast or a busy individual seeking a quick and stunning manicure, our handmade press-on nails are designed to deliver impeccable style without the hassle. Here we'll guide you through the simple steps of prepping, applying, and removing Glamade press-on nails to achieve a flawless and long-lasting look.

Preparation:
-
Start by ensuring your natural nails are clean, dry, and free from any oils or residue. Gently push back your cuticles with our wood cuticle stick to create a smooth surface for better adhesion.
-
Give your natural nails a light buff to create a slight texture, allowing the press-on nails to adhere better.
- Utilize the alcohol pad to cleanse your nail bed and eliminate excessive residue
Application:
Nail Glue:
- Apply the desired amount of glue on the press-on nail and on your natural nail. Please note the amount of glue depends on how long you would like to have the nails on.
-
Apply the press-on nail from the base of your nail and press down for 5 seconds so there are no air bubbles
- Once applied, file your nails as desired or leave them as is!
Removable Nail Tabs:
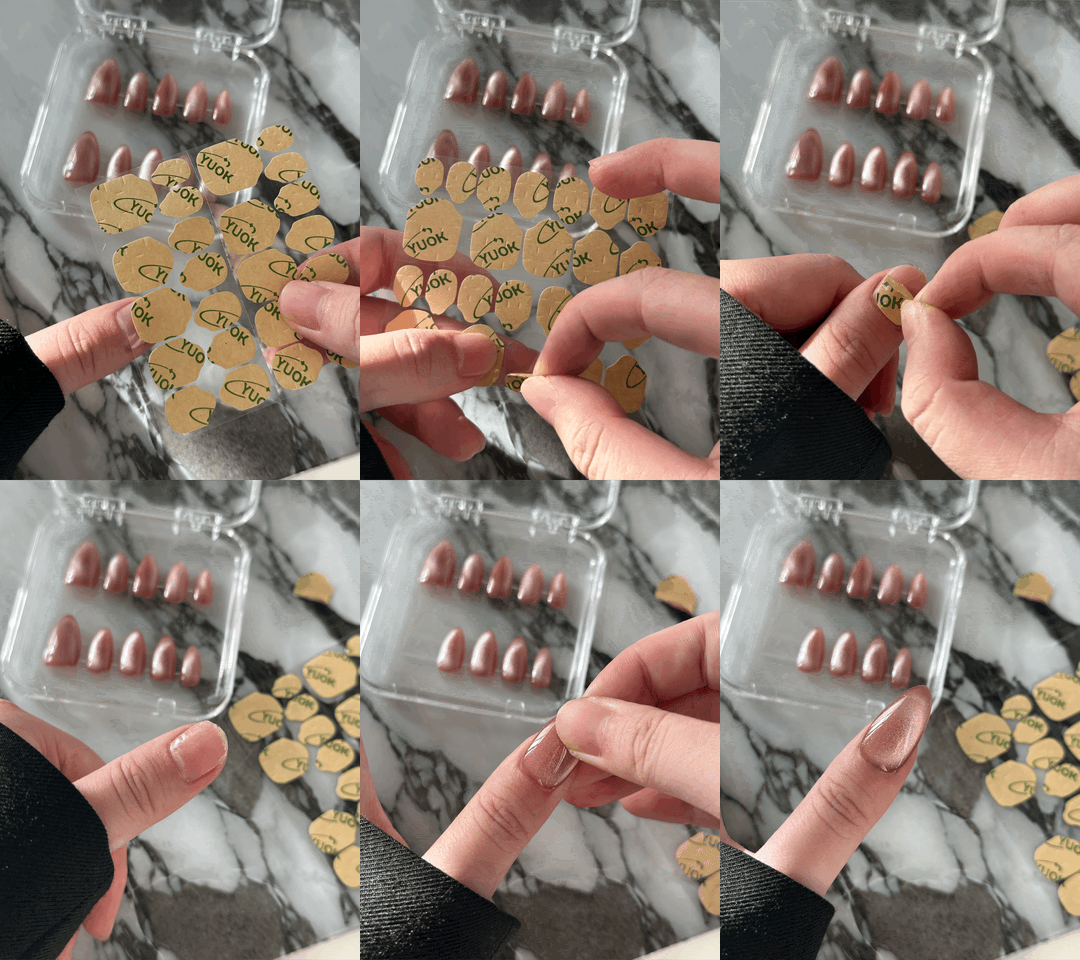
- Compare you nail to nail tabs to choose your size. Once you've selected your sizes you may begin removing one of the backs of the tab and apply it to the center of your nail. Press down for 30 seconds to ensure it’s stuck to your natural nail with no air bubbles.
- Once it's applied, you can remove the other back of the tab and apply the press-on nail. Hold it firmly for 30 seconds so it can properly attach.
- Do not wet your nails for at least 3-4 hours after you've applied the nails.

Solid Nail Tips Gel:
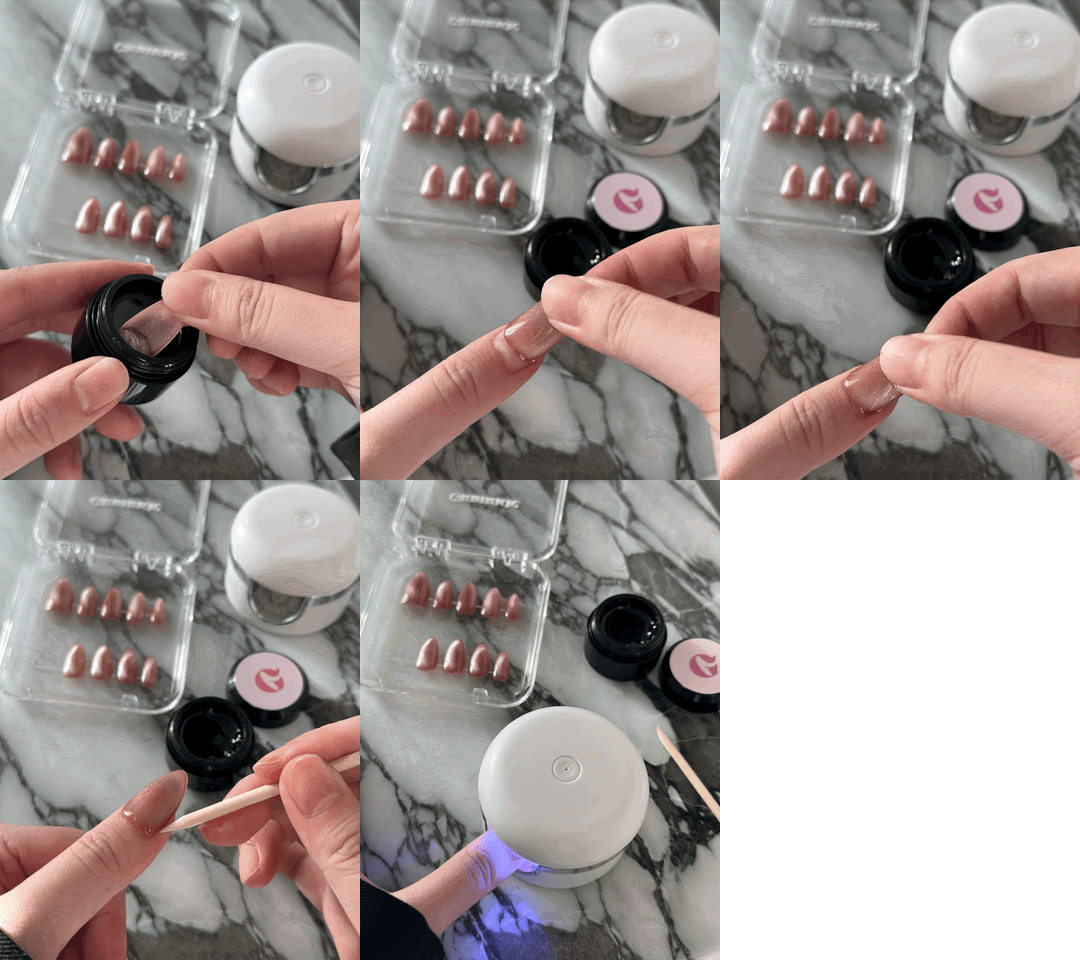
- Picked out an appropriate amount of solid nail gel with the bottom of your press-on nail to the inner side.
- Press the nail tip at 45 degree angle, and continue pressing the nail tip untill the gel reaches free edge
- Clean and remove excessive gel with cuticle stick and alcohol pad
- Cure under the LED nail lamp for 60s

Removal:
Nail Glue:
- Nail it with warmth - Dip your fingers into the bowl with warm water, dish soap, and oil. Let your nails soak for 10-15 minutes.
- The gentle farewell - Starting from one side, gently peel off the press-on nails, making sure to go slowly and avoid any nail damage.
Removable Nail Tabs:
-
Soak your hands in warm water for approximately 10 minutes. The warm water helps soften the gel tabs, making them easier to remove.
-
Use the cuticle stick to gently pry the gel tabs away from the natural nail. Start at the point where the gel tab meets the nail bed and carefully work your way outwards. With the help of the warm water soak from the previous step, the gel tabs should come off easily.
-
Once the gel tabs are removed, clean any remaining adhesive from both your natural nails and the gel tabs. And store them back you Glamade acrylix box for future usage.
Solid Nail Tips Gel:
- Use Glamade Removal Pen to remove
- Peel the gel off from the press on nails and store them back to the acrylic box for future usage
